Electron Microscope
The electron microscope was developed during the 1930s by Ernst Ruska and was first applied to biological specimens by Albert Claude, Keith Porter, and George Palade. The use of electron beams to deflect and focus that beam using electrostatic and magnetic coils or lenses is the basic principle of an electron microscope.
Because of the wave properties of electrons, the electron microscope possesses a high resolving power and it enables the visualization of the fine structure of bacteria, viruses, cells, and tissues.
Basic principle
The light source of the electron microscope is the electron gun. When a high voltage between 40000 and 100000 volts is passed between the cathode, the anode (a tungsten filament) emits electrons and these electrons pass through a hole in the anode forming an electron beam.

It is then focused by a condenser lens on the specimen. Since the electron cannot pass through a glass lens, it is passed through a stack of electromagnetic lenses (the column).
Columns containing the lenses and specimen must be kept under high vacuum to obtain a clear image, or else the electrons will get deflected by the collisions with air molecules. The focusing of the electron beam is done by changing the voltage across the electromagnetic lenses and when the electron beam passes through the specimen some electrons are scattered, while others are focused by the projector lens onto a phosphorescent screen and recorded. A denser region in the specimen scatters more electrons and therefore appears darker in the image and electron-transparent regions appear brighter.
Also read: Light Microscopy vs. Electron Microscopy – Understanding the Differences and Applications
Specimen preparation for electron microscopy:
1. Fixation
A fixative is a substance that stabilizes the life of the cell without significantly altering the structure of that cell and also avoids damage. To obtain the most rapid and least cellular damage, small segments of tissue specimens are fixed and embedded. The fixatives used are chemicals that will denature and precipitate cellular macromolecules and the most common fixative used is glutaraldehyde and osmium tetroxide.
Glutaraldehyde is a five-carbon compound with an aldehyde group at each end of the molecule and osmium tetroxide is used as a secondary fixative.
Cryofixation is another method of fixation where the specimen is fixed by rapid freezing using liquid nitrogen or liquid helium.
2. Rinsing
The fixation may lead to an increase in the acidity of the specimen so, to avoid this, it is properly rinsed with a buffer such as sodium cacodylate.
3. Dehydration
After fixation the water content in the tissue is removed by dehydration with an organic solvent, usually ethanol is used.
4. Infiltration
This is the step where the tissue space is filled with a material that supports tissue sectioning, usually epoxy resins are used such as, upon or Araldite. This process is also known as embedding. This resin is then kept at 60°overnight for setting
5. Polishing
The materials are polished after embedding to reduce scratches, to obtain quality images,
6. Cutting
To obtain a semi-transparent sample, the sample is cut with a microtome with a sharp cutting edge made of glass or finely polished diamond. The sections cut are collected in a trough with distilled water attached to the device. Sections that give the best resolution can be picked from this trough using a metal grid.
7. Staining
Staining of the tissue can be done by floating the grids with samples on drops of heavy metal solution, primarily with uranyl acetate and lead citrate. These heavy metal atoms bind to macromolecules and provide the atomic density required to scatter the electron beam.
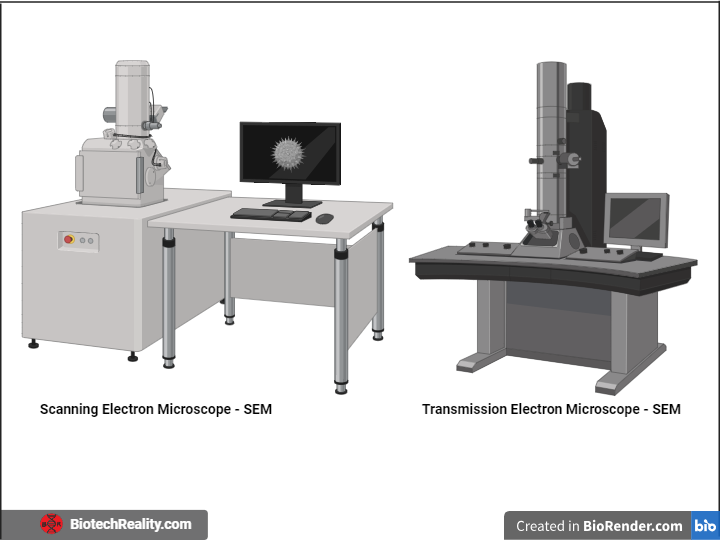
There are two kinds of electron microscopes,
1. Transmission electron microscope or TEM
2. Scanning electron microscope or SEM
1. Transmission electron microscope or TEM
TEM creates an image by using electrons that are transmitted through an ultra-thin specimen. Of the electron beams that incident on the specimen some will be absorbed, some will be scattered and some will be transmitted.

The basic outlook of a TEM consists of,
- The source of electrons is an electron gun
- A condenser lens that focuses the electron beam on the specimen
- An objective lens
- Two projector lenses for focusing the transmitted electron beam onto a fluorescent screen
- An observer (camera) to record the image.
2. Scanning electron microscope or SEM
SEM uses electrons that bounce back from the surface of the specimen, i.e., electrons that are reflected from the specimen. In SEM when the electron specimen incident on the specimen, several processes occur: backscattered electron, secondary electron, Auger electrons, unscatterd electrons, X-rays etc. are formed. The formed image contrast can be due to the surface morphology chemical composition or both of the given sample.
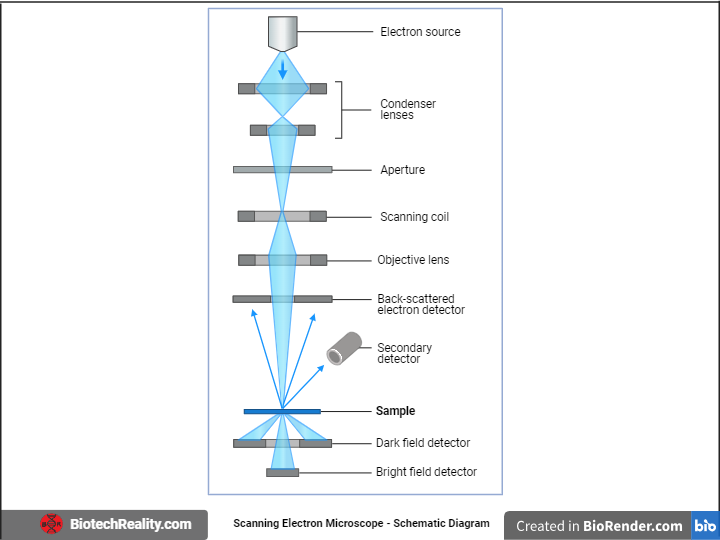
The secondary electrons ejected by inelastic scattering from the specimen are used most commonly for creating an image in SEM. The SEM can provide a large depth of focus, at 1000x magnification it is capable of a depth of focus which is 100 times more than an optical microscope.
SEM is not much used as TEM but it is in the used study of surface morphology of biomaterials, contact lenses, artificial skin etc. and can be used in the study of the shape of cells, bacteria, and viruses.
Applications
TEM
1. Biology and Life Sciences: TEMs are used in biological research to provide high-resolution images of cellular organelles and microbes. They can provide information on the organisation of membranes, organelles, and macromolecules within the cellular ultrastructure. Biological specimens are examined with cryo-TEM in their natural, frozen-hydrated form.
2. Medicine and Pharmaceuticals: TEMs are used to investigate the nanoscale structure of viruses, proteins, and other biomolecules. Understanding disease processes, developing new medications, and researching vaccines all benefit from this knowledge.
3. Environmental Science: To study the distribution and properties of nanoparticles and pollutants, TEMs can be used to analyse environmental materials such as air particulates, soil, and water samples.
SEM
1. Quality Control in Manufacturing: SEMs are utilised in industrial operations for quality assurance and failure investigation. They aid in finding flaws, evaluating the goods’ quality, and making sure that the components adhere to predetermined standards.
2. Biology and Life Sciences: The surface structures of biological objects, such as cells, tissues, and microbes, are studied using SEMs. They offer precise pictures of scales, hairs, and other biological characteristics, as well as cell surfaces.
3. Forensic Science: In forensic science, SEMs are used to examine traces of evidence like paint chips, fibres, and gunshot residue. They can provide information about these materials’ morphology and elemental makeup.
Author: Neethu Krishna
Edited: Achuth B S
Published: 21 September 2023|18:58
Updated: 21 September 2023|19:27